With the handling of the little SV now transformed with sparkling new Wilbers suspension, it’s time to look at the next thing to fix / upgrade.
Emma has always complained about the lack lustre light on her SV. Early on we upgraded the globe to a +100 H4 globe. However, even with the better globe – it’s still pretty ordinary.
The beaut thing about the naked SV is it looked to have a bog stock standard 7 inch round headlight so it should be pretty easy to just upgrade the whole lens. Well not quite! It turns out that the OEM light actually screws to the bezel rather than clipping in like a standard round lens. More on that later.
So what to replace it with…?
One of the coolest motorcycle headlight lenses on the market at the moment is the J.W.Speaker adaptive motorcycle headlight which incorporates a lean angle sensor turning on a series of side LEDs as you lean for fill-in light. Very cool.! However at around AU$1,000 they are outside our budget.
Stepping back from the premium option … there are many really cheap LED lenses available online but you just never know what you’re going to get so I’d rather pay a bit more and get something that works.
I’ve always had great advice from Lex from Provision Lighting, so after a couple of emails we settled on the 60W LED headlight. Then the tough question … black or chrome?


So we printed out pictures of them both and stuck them on the bike to see what they would look like. Originally we weren’t going for the black as the whole bike is silver, but after sticking the printout on … it did make the bike look cool. So black it is.
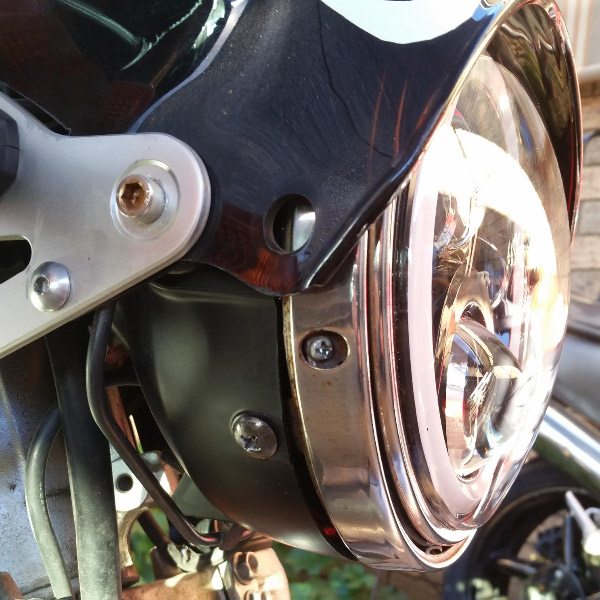
After getting the new lens we popped out the old lens, and as I mentioned above it didn’t fit as the bezel on the old lens isn’t compatible with a standard round light. In the end I went wandering through our local bike wreckers and found a 7″ bezel that should fit as it had standard round lens and similar mounting points.
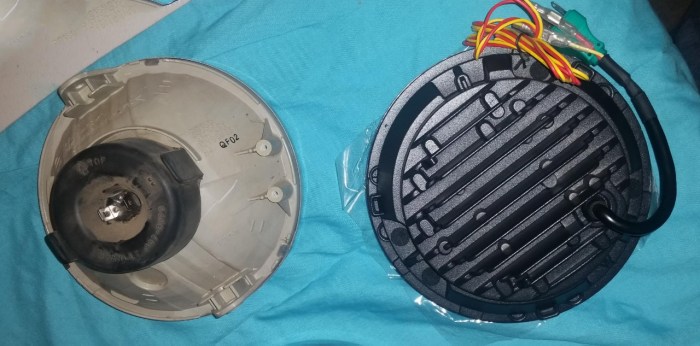
OEM lens vs LED lens
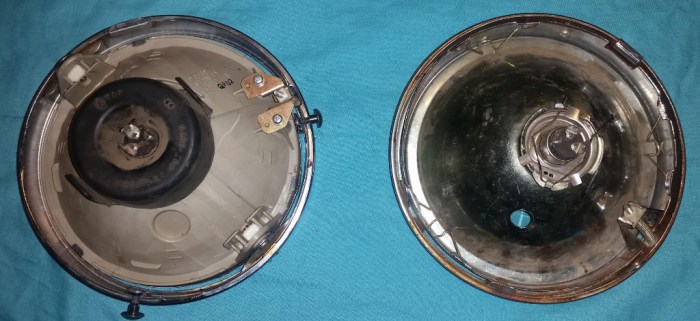 OEM lens (left) screwed directly to the bezel, compared to the wrecker sourced bezel that mounts the lens with a series of clips.
While the mounting points of the other bezel are ‘similar’ they aren’t exactly the same so it didn’t fit perfectly into the OEM light bucket. We may need to look at a better (neater) solution longer term but for now some strategically placed tape should mask the ill fitting bezel.
Light Performance
So what’s it like?!
My mistake was taking out my point and shoot camera to do the comparison photos as it didn’t give me enough control to shoot all four photos with the identical settings. In the end I plugged all the photo settings (shutter, aperture, ISO) into an exposure calculator and the photos of the OEM lights were 1.67 higher exposed than the LED light photos. To compensate for that I have dropped the exposure setting (via software) of the OEM photos by 1.6 which provides an accurate representation between the two headlights.
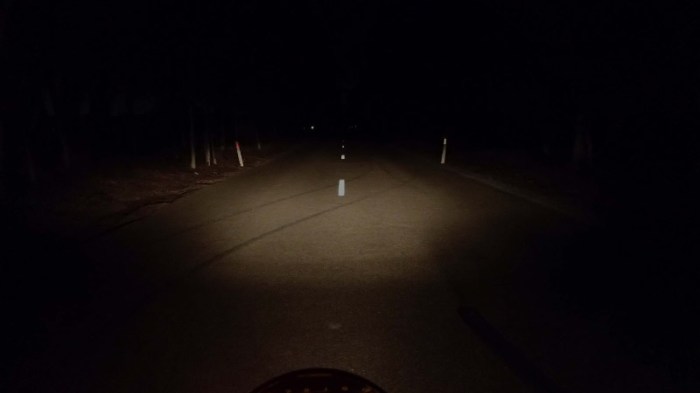
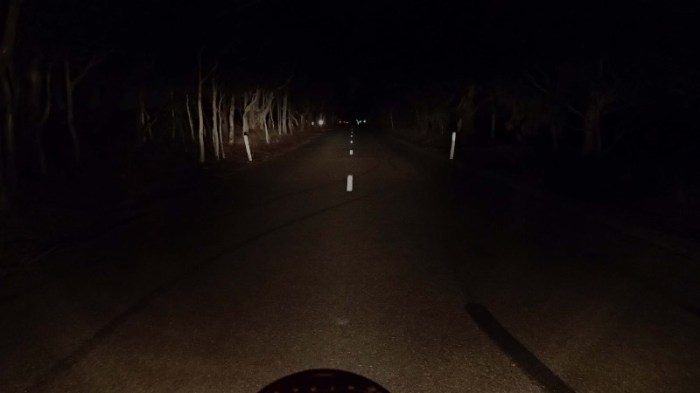
Light Performance – Low Beam – OEM (top) vs LED

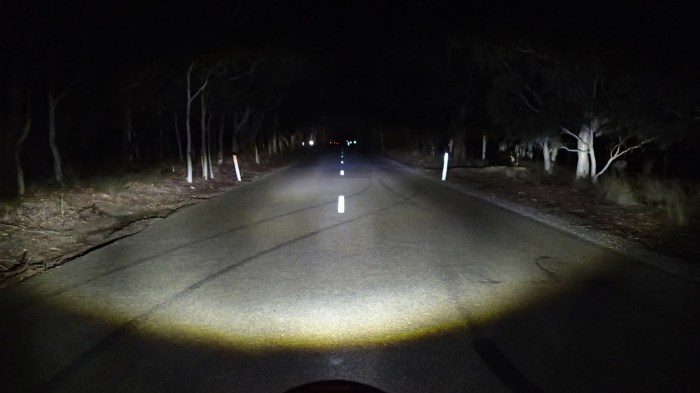
Light Performance – High Beam – OEM (top) vs LED


Conclusion
I have to admit that when I first took Emma’s bike for a ride I was a little under-whelmed. But that wasn’t fair as I was comparing it to my bike which has 4 projector headlights with LED globes and 2 LED aux driving lights. Once I readjusted my expectations and realised that I was in fact comparing the upgrade to my bike’s lights showed just how much better the new light is.!
Low beam – like night and day! I can see why Emma hated riding this bike at night the OEM light was shocking.! The LED on low beam provides a huge amount of light with a well defined beam pattern with a nice cut-off so as not to annoy oncoming traffic, and with a nice wide pattern to light up both sides of the road.
I would have upgraded for the low beam alone.
High beam – primarily the high beam adds a central spot above the low beam pattern and a bit of additional fill-in on the sides. Ideally I’d like to see a bit more punch down the road and fill on the sides.
Overall however, this is a great light. While I’d like to see more light on high beam, you can always add driving lights if you do a lot of open road night riding. The strength of this light is it’s low beam – I find it’s really important to have a solid low beam as there is nothing worse than dipping from a wall of light to a candle-powered low beam and losing the road.
This has been a great upgrade and I would certainly recommend this light.
And to the opinion that really matters … Emma loves her new light.


Agree Glen, the low beam is very good. While the Highbeam could use more punch straight up the road overall it’s a great solution at a good price.
LikeLiked by 1 person
Amazing, what a difference a headlight makes.
LikeLike
I was never game to ride much after dark in Australia due to wildlife.
LikeLike
I’ve done a lot of miles after dark here over the years. Good lights certainly make a big difference.
It also depends a bit on your risk appetite.
LikeLike