Long distance riders do a lot of riding at night. And with the constant threat of wildlife and other road hazards, lights are a very important part of a riders standard equipment.
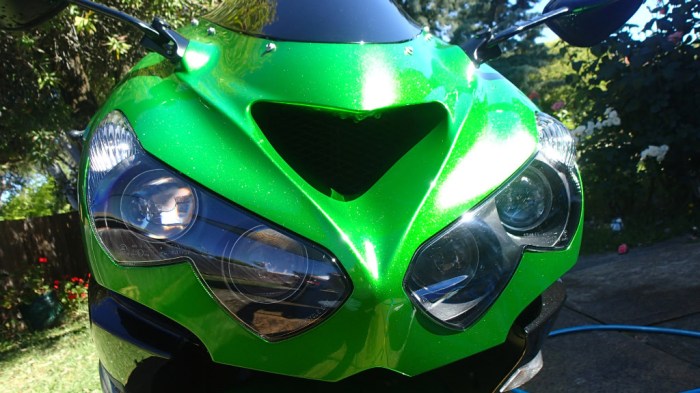
My standard approach to improving a bike’s lighting is to first upgrade the existing lighting and then assess what additional lighting is required from driving/spot lights. The Kawasaki ZX14 and ZX14R come standard with 4 projector lights – 2 low beam lights running Halogen 55W H11 globes, and 2 high beam lights running halogen 65W H9 globes.
To upgrade existing lighting there are a few options:
- upgrade the current globes to better quality – there are a number of companies such as Philips and Narva that specialise in improved direct replacement globes that offer more light for the same power (which is especially important if your vehicle has a CAN bus electrical system).
- upgrade to higher wattage globes – the disadvantage with this approach is that current headlight lenses do not handle the additional heat generated from higher wattage globes and have been known to melt. Upgrading the wattage can also requires an upgrade to the wiring harness as they often are not designed for higher amperage.
- upgrade to HID globes – High Intensity Discharge lights are essentially an arc light available in a number of wattages and colour temperatures (expressed in Kelvin). The advantage of HID globes is that they offer approximately 3 times the light output of standard halogen globes at a lower power rating. However, there are a number of disadvantages – they take time to warm up and high quality ones can still take a few seconds to come to full brightness, and not all lenses can handle this amount of light and just spray light everywhere. On low beam this is especially an issue for oncoming traffic.
- Upgrade to LED globes – until recently this hasn’t been a viable option as LED technology hasn’t been good enough. However now there are a number of LED globes on the market that provide significantly more light output than the standard halogen globes.
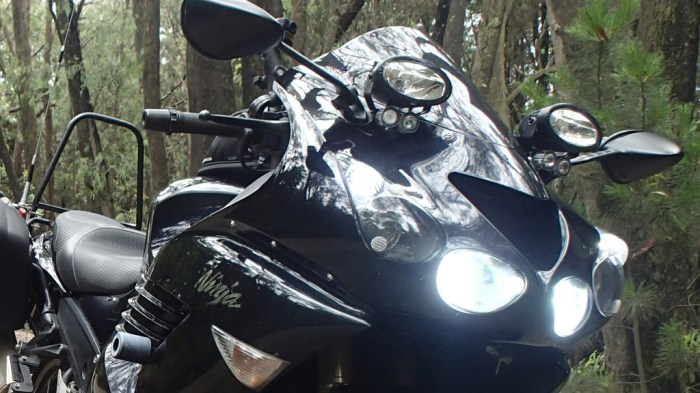
On my old ZX14 I ran 35W HID globes in the low beams, 55W HID in the high beams, and a pair of Hella FF50s driving lights with 55W halogen globes. This provided a good spread of light but it really needed some extra punch down the middle.
For my new bike I want to go with a full LED setup, if possible, as it should provides similar lighting at lower overall power and with instant lighting.
Step 1 – upgrade standard lights
Against my better judgement I bought some cheap ($50) LED replacement globes off eBay which proved to be a waste of money. They simply didn’t live up to their hype and just didn’t work in my projector lights. The claimed 10,000 lumens was rubbish and I reverted to my halogen globes.
Further investigation and discussions with Lex at Provision Lighting and Electrical and projector lights require a special LED globe designed to work in projector lenses. At $250 a set they are not cheap but I ordered a set to try and if they worked I would purchase a second set.
And this is what you get for $250 – 30 watt, 6000lm single sided LED with some sort of dispersion bubble covering the LEDs. For cooling they have a fan. They also come with an adjustable mount that can turn the full 360 degrees which allows you to adjust the optimal beam pattern for your lights.


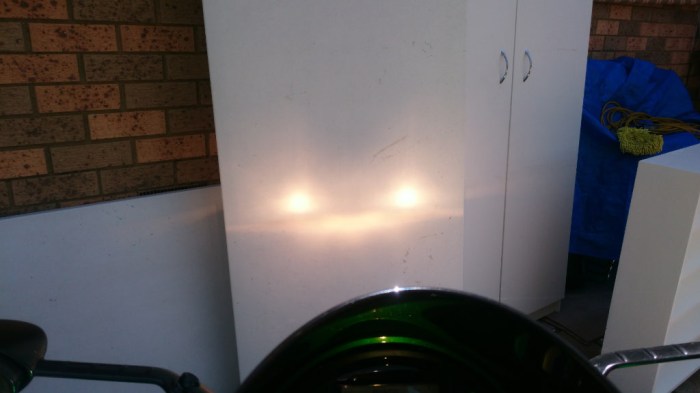
Standard beam
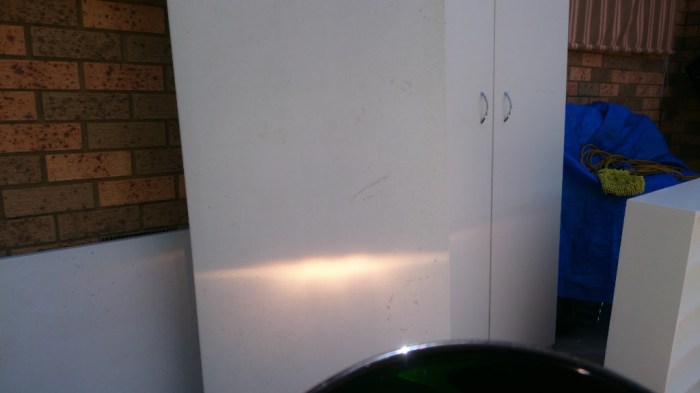
Standard low beam 55W halogen globes
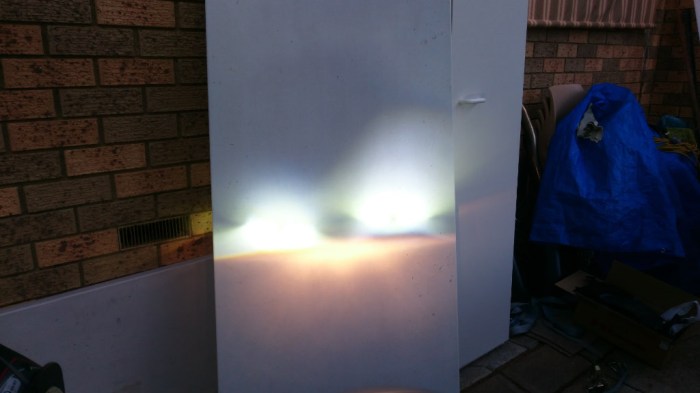
LED low beam
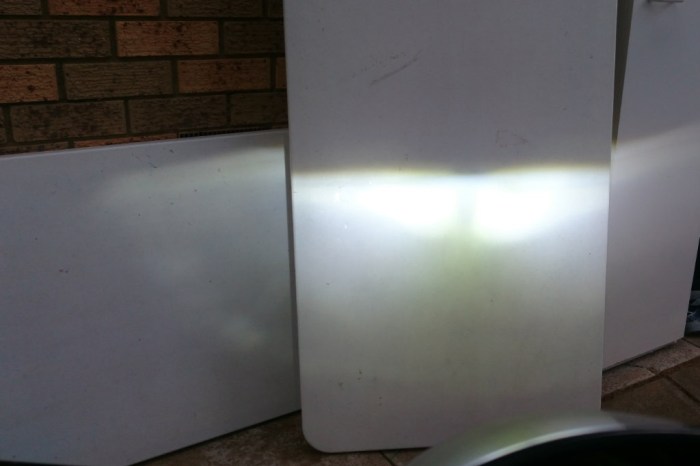
LED low beam – with both LED globes mounted in the low beam projectors with the globes pointing up and 45 degrees inwards provides a nice low and wide beam pattern.
And a comparison in the real world. Please note these are only taken by my phone but they provide a clear indication of the improvement over the standard globes.


High Beam
LED high beams – left pointing up, right pointing down. In the end both beams look like the one one the right but spun around to fill in the outside.
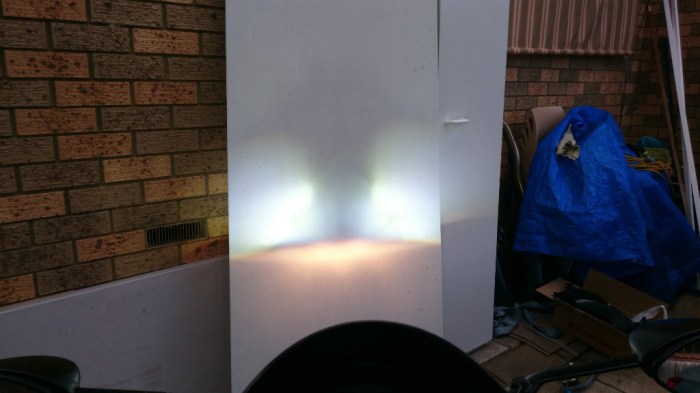
LED high beams both pointed to give minimum dark spots to the edges. While this shows a dark area in the middle, at this close distance it is exaggerated and not as bad as this seems.


Step 2 – supplemental lighting
The upgrade to LED globes in the headlights has made a huge improvement in my overall lighting. Both in the amount of light and coverage, and for freeway riding they would be more than adequate. However for country roads I’d like a bit more punch down the road and maybe a bit more fill above the low beams.
Enter driving lights. There a a number of problems with mounting driving lights on motorcycles: where do you mount them; how much power can the bike handle; what type of beam pattern is best.
- Mounting lights – on big sports bikes with acres of plastic fairings you have to get a bit creative to find mounting points. On my bike the only study mounting point that can be utilised are the mirror mounts as they mount to a metal sub frame. And while the new bike has a slightly different upper fairing my old mirror mounts I fabricated, fit perfectly.
- Power – does your bikes charging system provide enough spare capacity to power any accessories you add? This is important so you aren’t left sitting on the side of the road in the middle of nowhere, in the middle of the night, with a flat battery (been there). By swapping globes to LED actually saves an overall 110 watts power that can be used elsewhere. However it can still be a juggling act if you want to run heated grips, heated gear and driving lights all at the same time. The trick – monitor the voltage.
- Beam pattern – and now we are getting serious. Up until the last few years LED globes have just been bright, throwing a lot of light out without any real ‘shape’. A couple of friends have Rigid Industry light bars which by all accounts are industry leaders. Their LED lights come out in a variety of patterns, such as wide; driving; spot; and hyper spot (see below for their range of light patterns). Each pattern has a distinctive pattern and purpose.

I borrowed their Rigid Industries 10″ SR2 combo light bar and stuck it onto my bike to test. Due to the shape of the light it needed to be mounted fairly high – it certainly looked very “purposeful” and garnered a lot of looks. But it wasn’t on there for looks but testing purposes.
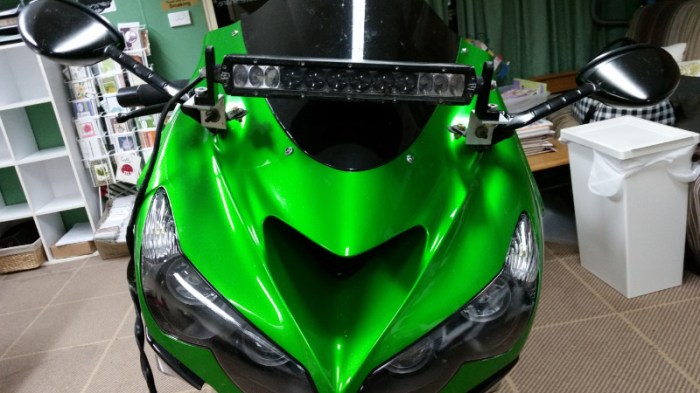
This 10″Rigid Industries combination light bar has 6 hyperspot LEDs and 6 driving LEDs. And while photos don’t show it very well the light bar added more fill above the low beam and more light straight down the road to show up anything that may stray onto the road.


So with a successful test I had a discussion with the guys at Snake racing about options for similar lighting that isn’t a light bar. So in the end I decided on a pair of SRQ2 series lights that would provide both a driving pattern and a spot pattern of light which should end up with a similar pattern to the light bar.
This combination won’t suit everyone. If the extent of your night riding is winding roads or you just want a bit more light than you’d be better off going with a pair of the wider driving pattern lights. A tight spot of light doesn’t suit that style of riding at all. I do a lot of night riding on open country roads and highways where a bit of distance is an advantage.
However, due to some unforeseen expenses I have had to delay the purchase of the LED driving lights for now. So as I’m heading out of town this weekend I have ended up putting my old Hella FF50’s halogen driving lights back on.


The little Hella driving lights certainly add some fill but they still lack the punch down the middle I need. Overall this is a huge improvement on the standard lights.
When I get a bit more financial the FF50s will be replaced with some LED driving lights. Maybe when I’m in a postiion to upgrade the FF50s there will be something new and improved out. Stay tuned..
Kawasaki ZX14 Light Bracket this is a link to a pdf template of the bracket I made to mount the driving lights off the mirror mount. My initial brackets where way too light and the lights wobbled and the bracket eventually broke under the weight of these LED lights. I have now made new brackets out of 3mm steel.
Next chapter – Lighting – Part II


Nice. On my Connie I’ve simply replaced the bulbs with Phillip’s +100’s and they’re pretty good. But on my Tenere I’ve fitted some Denali D4 LED lights: http://banditrider.blogspot.co.nz/2017/02/enlightening-farkle.html. They offer both a wide spread (love that) as well as a bit more light out the front – impressed so far.
I’ve seen the LED bulb replacements and been tempted…perhaps the Connie needs some…
LikeLike
Just upgrading globes makes a big difference and it amazes me that many riders just put up with standard globes.
LikeLike
Pingback: Lighting – Part II | zed14
I upgraded the lamp on my BMW f650GS with a Cyclops LED and it’s been the best upgrade I’ve made to the bike. This year I added the Cyclops Long Range set. I’ve tested it in the suburbs but not yet where it counts. LEDs are the way to go, for sure.
LikeLike
I’ve heard that cyclops are great especially for canbus systems.
Yes like you itching to get out and do some touring.
LikeLike
Zed, Do you still love the LED upgrade from Provision? Would you recommend ?
LikeLike
These are great globes and work really well in the projector lenses on the 14 and I am still very happy with them. I’m not sure how good these high output globes are in traditional lenses as they tend spray light everywhere.
LikeLike
Is there anyway that I could purchase two of your fabricated mounting plates you created? I sent you a message on IG.
LikeLike
Hi Gabriel – sorry I don’t make and sell these mounts but I did provide a rough template in the article if you want to make them.
LikeLike