What makes the perfect bike screen.?
On a motorcycle the screen can be a styling feature, an integral part of the bike’s aerodynamics, or the proverbial barn door protecting you from the elements.
Looking at motorcycles you can generally see their function. For a bike like the ZX14R it’s about the speed, tucked down, chin down near the tank, throttle pinned wide open, speed dialled into warp factor 9. At the other extreme is the Goldwing where it’s about cruising, sitting in a bubble of quiet air, face shield up soaking in the rays with a soundtrack blaring from the dash speakers. Both of these require very different approaches to screens. And unlike a car, the bike rider (and passenger) are hanging out in the breeze and let’s face it we come in all different sizes and shapes. So what works for me may not work for someone else.
On our recent trip in North America I found that the Electra Glide’s screen just didn’t suit me as it created really bad buffeting around my helmet and at times it was so bad that my vision actually went blurry. I experimented with a few things (even removing the screen) and in the end I found slouching down was the only answer. Not really a long term solution if I owned the bike. Clearly I’m not the only one with this problem as I was surprised that most Harley dealers had different screen sizes that you could bolt on and take for a test ride to find the one best suited to you. That’s much easier with the number of Glides running around and they seem to be a fairly standard size.
If all you do is the occasional coffee run down to the shop … why would you bother except for pure cosmetic purposes to make your bike stand out from the crowd. However, if you get out and do serious miles then its about making the ride more comfortable … so that you can do more miles, get there more comfortably, and minimise those things that force you to stop.
It surprises me the number of riders who don’t experiment with ergonomics and screens on their motorcycle in order to make them more comfortable to ride. Setting up a bike to suit you makes a world of difference for riding, not unlike moving the seat and steering wheel when you jump in a car. I have dedicated a previous post on other ergonomic changes I have made in regards to lower foot pegs, bar raisers, and custom seat.
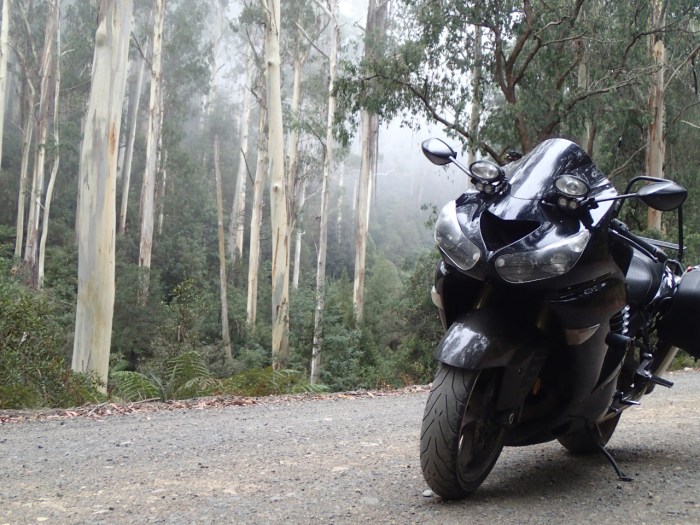
Screens are the other big thing that riders change and there are so many options out there and for everyone out there who loves their screen there is an equal number who dislike it. For my 2008 ZX14 and 2014 ZX14R I have tried a number of different screens with varying success. The following is a summary of the screens I’ve tried and my thoughts on each.
Standard screen
I found the standard screen created a lot of turbulence and head weave which would become very tiring and fatiguing after a few hours in the saddle. This started me on the search for a better screen option.

Laminar Lip
The first thing I tried was the Laminar Lip which mounted on top of the standard screen providing a scoop directing air up and over the rider. The screen provided much smoother airflow but I found the screen was significantly noisier than the standard screen. However it was much nicer to use on longer trips provided you used ear protection.
However the Laminar Lip was not pillion friendly. What I found was that the Laminar Lip created a swirling airflow over the pillion’s head putting downward pressure on their helmet. This was giving my wife a very sore neck. Given the amount of pillioning I do, I ended up removing the Laminar Lip.

Harden – NSW

Out of Crookwell, NSW
Double Bubble
The other option very popular on sports bikes is the double bubble providing more protection without dramatically changing the profile of the bike. For me the double bubble provided a great compromise on my 2008 ZX14 and it stayed on the bike for about 180,000km.
On my 2008 ZX14 I used a cheap eBay special that only cost around $40 but it worked a treat providing good protection and air flow at normal highway speeds, and many hours of sustained Northern Territory 130km/h speed. And when I was in the NT in 2014 they still had a 200km section of open speed limit and the screen worked well for sustained speeds well over 200km/h although you certainly had to start tucking in at those speeds.

West MacDonnell Ranges – NT
The Bonang – NSW/VIC
My current 2014 ZX14R already had a double bubble installed when I purchased the bike and based on what I already knew I stayed with the double bubble. However this screen must have a slightly different profile or my Schubert (S2 Sport) helmet isn’t as good as the old Arai (Vector 2) on higher speed runs. On my last run up the centre of Australia I couldn’t sustain the higher speeds as there was significantly more buffeting than the old screen/helmet combination and I ended up with a very sore neck resulting in a severe headache. In the end I had to pull out of the ride and decided that I’d have to make changes before attempting a ride like this again.
Therefore since then I have been looking at other options for this bike and potentially changing helmets back to another Arai for future longer runs.

The Breakaways – SA

Deua NP – NSW
Zero Gravity Touring Screen
Zero Gravity make a variety of screens for the ZX14R including a specific touring screen which is much taller than the double bubble. I really wasn’t sure about this one, both aesthetics or functionality.
Firstly I am not a fan of how it looks (but not as bad as the MadStad screen – I couldn’t come at that one!) but I could nearly cope with the looks if it worked. However I found that at any speed it was loud and the air stream over the screen horrible. I even hated it for commuting at 80km/h. But I still gave it a decent test and did a 3,000km weekend trip with it and I just couldn’t make friends with it. When I got home I chopped holes in it to see if I could make it work but that didn’t work, so in the end I ripped it off and stuck it deep in the back of the cupboard.
I probably should have gone for their double bubble as it has a different profile to my existing double bubble.

Spring Ridge – NSW

Armidale – NSW
MRA Touring Screen
After a bit of searching I came across the MRA touring screen and overall it had positive comments. It looked like it was a bit taller without looking bad, and the low pressure vents was something that I had experimented with on the Zero Gravity screen. My concern was the flick and whether it would have a negative effect on my passenger.
I have now had the screen installed for two months and over 2,500km over varying types of riding.
I think this is the best screen that I have tried to date and provides a nice smooth air stream from slouched down to sitting up tall. I think it is a bit noisier than the double bubble.
From a pillion’s perspective the air stream felt pretty good but it was noisier than the previous screen.

Screens side-by-side
Here are a few photos of the screens (sans the oem screen) and a couple of observations –
- the MRA Touring and Zero Gravity Touring screens are considerably longer.
- I was surprised to see that there is very little difference in the overall height better the double bubble and MRA screens. However their overall profile is very different.
- the laminar lip will fit on the MRA screen.
- the cutout I made on the Zero Gravity screen looks terrible! Certainly not my best work but I was desperate to try something to make it work. Fail.


Setting out all the screens I noticed that the Laminar Lip could be mounted on the MRA Touring screen and I wondered whether it would further improve the outcome. I was surprised to find that there actually wasn’t a huge difference, however, it really needs a better test than a 40km highway run. However the double screen was noisier … and there is still the issue of the Laminar Lip putting pressure on the pillion’s helmet.

Conclusion
For me the MRA touring screen is the best compromise that I have found to date.
However I have mentioned it already, the screen is only one part of the airflow, noise, and comfort equation. The other big factor … the helmet. Over the years I have found different helmets react very different in the wind with some helmets having a considerable amount of drag causing neck pain after sustained periods on the bike. The problem is that there is no real way of testing helmets and a few years ago I tried saving a bit of money in buying a bit cheaper helmet only to stick it in the cupboard a month later and buy another Arai – link.
Wouldn’t it be great if you could ride your bike into a wind tunnel and try different screen and helmet combinations in order to find your ideal setup…!


On my K1300S I also went with an MRA screen. On my 2011 GSA I was quite comfortable with the stock screen. I am, however, considering getting a MRA spoiler for my new bike.
LikeLike
Yes the MRA screen seems to do the trick.
I’ve been looking at a touring bike option for the 2 of us and took a K1600GTL for a ride recently and was surprised that I couldn’t find a screen position that worked for us – so if I end up with a K1600 I’d need to look for a different screen.
LikeLike
There are a lot of options out there. I prefer the standard on my CBR600RR. There is enough room for my to lean down on my tank bag and still tuck in behind to get out of the wind. When I’m upright the air seems to wash over me in a nice orderly fashion.
LikeLike
thanks for the comment. Yes I’ve certainly had bikes that I’ve tried different screens and ultimately gone back to the standard screen.
LikeLiked by 1 person
Great article. I do change the position of mine on my 08 Goldwing, depending on what helmet I’m wearing, weather, and if its long distance or just going to work.
LikeLike
Yes one of my big considerations is big mile days where the cumulative impact add up quickly.
LikeLike
Nice write up. I have 2 screens for my Zx-14, I use either the original or the Zero Gravity Touring. For me, it all depends on where I’m going. I like the factory screen in very warm weather, but prefer the protection provided by the bigger touring screen when I’m on a trip. I almost never have a passenger and never gave the screen’s effect on them any thought.
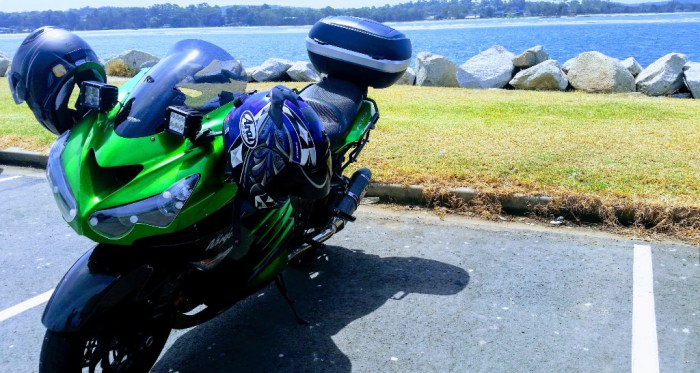
I am curious about the lights mounted on your mirrors. Are the mounting brackets an after market piece or something custom you made?
LikeLike
I do a lot of miles with a pillion so they are certainly a consideration.
I fabricated the light brackets. Yesterday I actually thought about loading up the template (on the post about the lights) I made for others who are interested. I have mounted a set of Rigid Industry D2 lights (hyperspot and driving) I have also converted the headlights to LED so overall even with the spotties on I am drawing less overall power but have much better light.
LikeLike
If you’re interested in the template for the light bracket I have added it to the blog post on the lights –
https://zed14.com/2017/06/24/lighting-part-ii/
LikeLike
I am still using the stock screen on my ZX14, thanks for comparing the others. Most people I know are using Zero Gravity, I just don’t like it.
LikeLike
Thanks for tje comment. The touring zero gravity didn’t last long as it didn’t work for me and it looked ugly.
LikeLike
Hi Glen, thanks for an informative and detailed article. For my 5 bikes (mostly HD tourers) I’ve been through the same exercise of trying different screen heights and shapes. While the taller screens were great at blocking wind at highways speeds I roasted in the summer heat & humidity. Also, with the taller screens I couldn’t see past the shield when it rained at night. I Ultimately settled for a screen from Freedom Shields with a recurve at the top and a height that is at eye level. This gave me the best compromise in controlling the wind and seeing what’s ahead. DanS
LikeLike
Yes it’s always a bit of a compromise, and what you compromise but for me its seeing over the screen and smooth air. I noticed riding the Electra Glide a couple of years ago in the US that the standard screen for me created lots of turbulence – if it was my bike that’d be one of the first changes I would have made.
LikeLiked by 1 person
Appreciate your blogg post
LikeLike
thanks Carl
LikeLike