There’s always a process after purchasing a bike, whether new or second hand, of transforming it into something that fits you and your needs. That could be adding farkles or just setting up the ergonomics for you. It could be just to make it look cool when it’s outside your favorite cafe. Or getting ready for that transcontinental trip you’re planning.
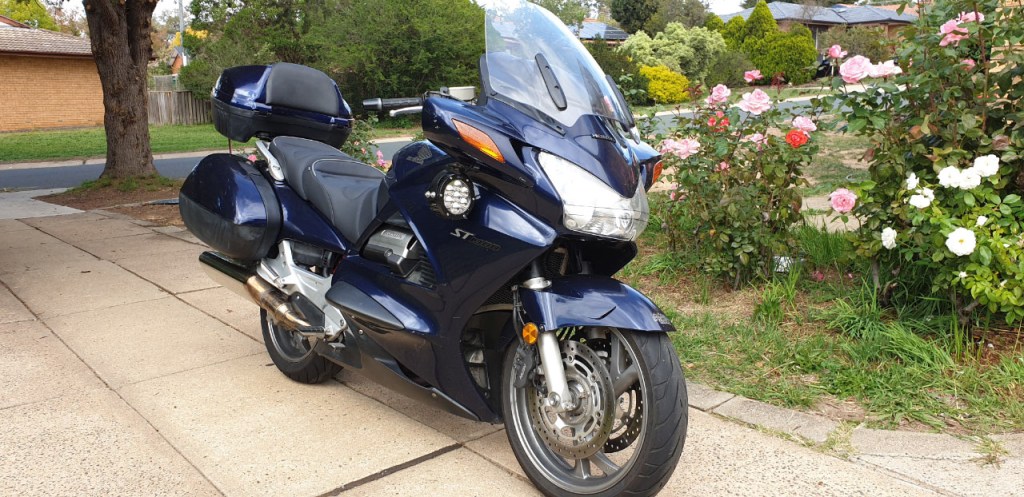
For us the ST represents two up adventures out on the open road. Sharing time together. So the bike needs to be set up with that in mind – capable of big comfortable touring miles.
We’ve been out for a few rides now and there’s a few obvious things that need to be addressed. And beyond that there will be some nice to haves that we can look at down the track.
The immediate things that I want to sort out relate to the overall comfort of the bike and the handling of the bike for trips. So I have been doing some work on upgrading the lights, improving the suspension, getting a better seat, and seeing what I can do about the screen.
Overall this isn’t a very expensive bike so I don’t want to put too much money into it, but at the same time I am keen to set it up so that it works for us.
Lights
The lights are pretty poor. It seems to have a decent light pattern but there just isn’t enough lumens out there. Upon looking into the lights the bike appeared to still have the oem 45/45 watt globes installed … So no wonder there isn’t much light.
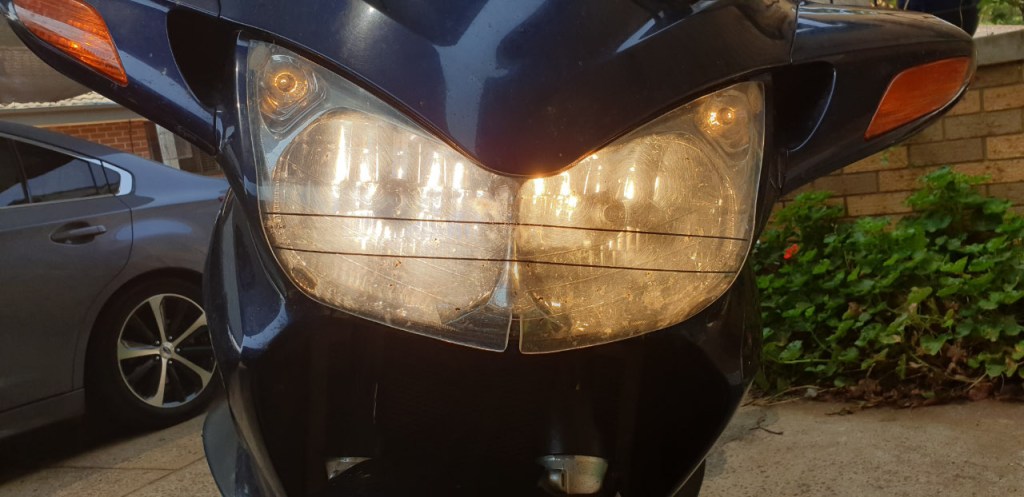
Lowbeam 55w left / 45w right 
H4 with lower tabs removed
The trick with these older Hondas is that their H4 globes really isn’t a H4 globe as the spacing of the lower two tabs is different to a standard H4. Therefore in order to make them fit you need to remove the lower tabs in order for the globe. To help the modified H4 globes fit securely you can purchase adapter plates, however these aren’t essential.
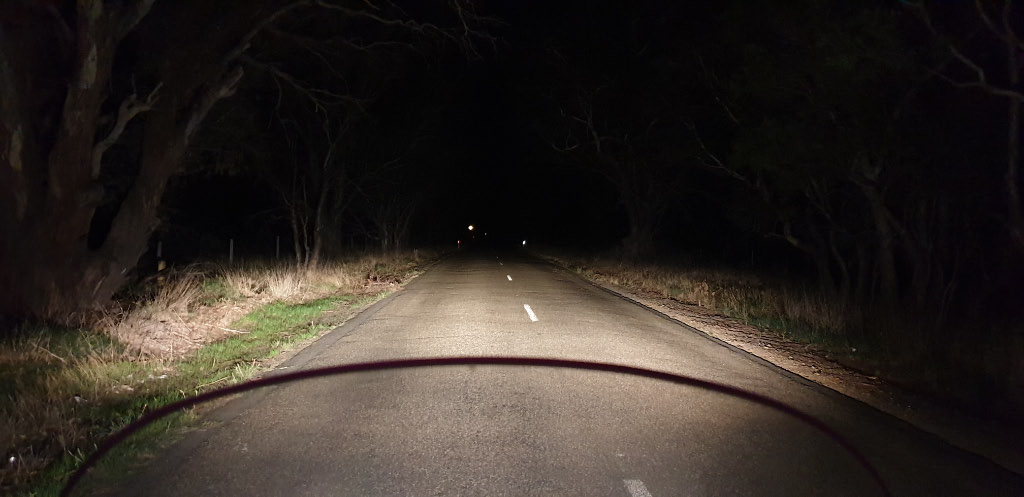
Given the amount of night riding I generally do it is nice to have more light than the standard headlights provide (even with upgraded globes). For the ST there are two mounting options for driving lights – above the mirrors and below the mirrors. Or if you want a lot of light you can do both.
As the ST1300 was used for emergency services in different places around the world you can purchase the specially designed mounts that mount above the mirror and allow driving lights to bolt right on. However the lights are mounted up high and don’t look that great. However, given how they mount it should only be a matter of 10 minutes to put them on or remove them for night runs.
In contrast under mirror mounts are not as imposing or intrusive and can be left on for day-to-day riding. While there are a few options out there for under mirror mounts I decided to fabricate my own mounts.


Installed – I added a gusset to give it more strength
In the end I have used 3mm steel and while there is a bit of movement. Rather than going to 5mm steel I am thinking of welding a gusset along the long edge to strengthen it. That should remove any wobble.
The final result.
Low Beam 
Hegh Beam 
High with LEDs
Overall it’s a big improvement although I think I will look for some better quality LEDs down the track as these ones just don’t have the punch that I would like.
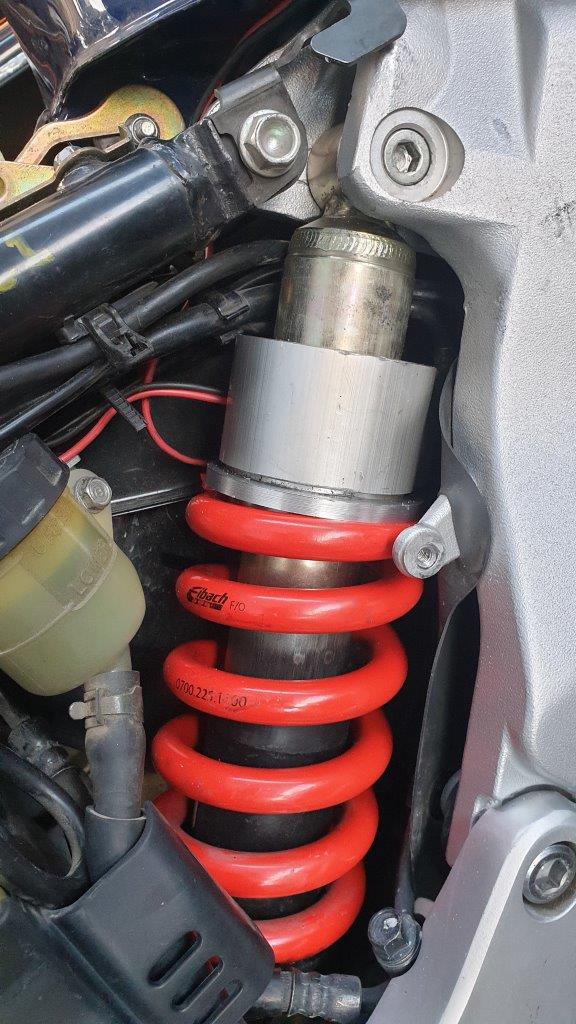
Suspension
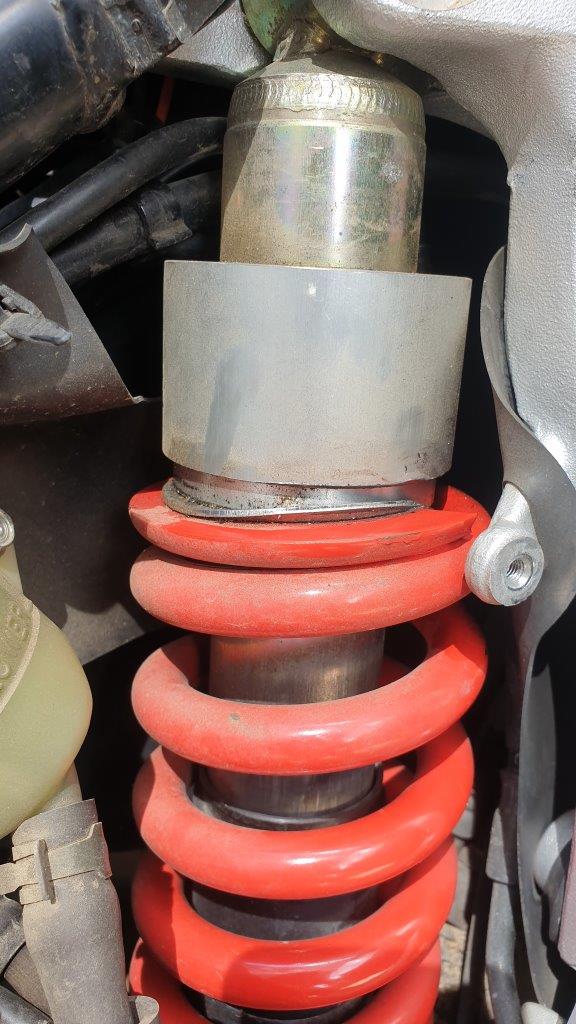
While the bike has only travelled 70,000km, it is very undersprung (too soft) and after our first ride I wound up the preload to the max and increased the dampening which certainly improved the handling. However the suspension was going to need some work.
A quick call to the guys at Suspension R Us (who supplied the suspension components for the SV650) and they suggested a 640 Wilbers rear shock with remote preload adjuster and a set of progressive springs for the forks. That was going to cost me around $1400, and I was going to have to do all the work … not that I have a problem with that but I’m a bit time poor and I’d rather be riding than working on it.
I was aware that the forks really needed a bit more lovin’ then just new springs and oil. The front end on these bikes are pretty basic units with no external adjustments. So I took the bike out to Laurie at Suspension Smith to have a look. In the end I left the bike with Laurie to give the front forks a full service, new heavier springs (1kg), and re-valve them to get some more performance from them. He did the same to the rear installing a heavier spring (20kg) that would work for us with luggage but not be too stiff for just solo riding, and he also re-valved and re-gassed the unit.
Laurie then dialed the bike in for both me for solo riding and for two-up riding. He instructed me on the preload and dampening settings that I needed to make to switch between solo and two-up riding.

Fine tuning motorcycle suspension can be a black art. Laurie provides a suspension setup service where for $50 he will set your bike’s suspension for you. It makes a big difference having a bike properly setup for you.
First solo ride – 400km spin taking in rough backroads to freeways in wind and rain. The bike is now much more composed and sure-footed, where it used move around and wallow it now just takes ever bump in its stride giving you much more confidence.
First two-up ride – 300km ride for lunch at Batemans Bay. Where before it would wallow through corners now it is much more settled and hanles mid-corner bumps with ease. Before my feet would hit the ground on corners as the bike sat very low. Now it sits much taller and there is plenty of ground clearance to hook into the turns.
Overall this was a great outcome and has made a huge improvement to the overall handling of the.
update
Putting on the heavier spring on the back bent the original hydraulic remote preload plunger. To fix this my suspension guy made a heavier duty plunger and added an extra 5mm to provide a bit more preload as we were finding that it was a bit soft when fully loaded and towing the trailer.
Before – bent preload adjuster 
After – with the new plunger

Luggage
The ST1300 has great storage with removeable panniers that look integrated that will fit a full face helmet and a top box that will easily hold two full face helmets.
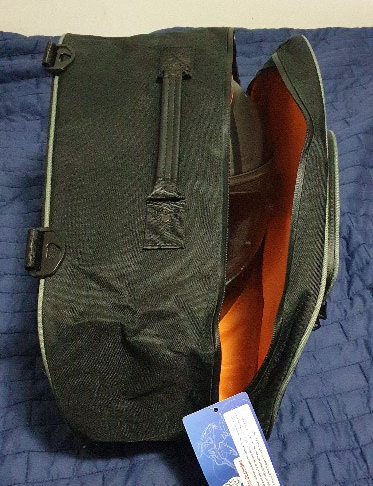
Once you have used pannier inner bags you won’t go back. I remember when we stopped in Ascona Switzerland we had to walk about 400m to our accommodation with full panniers. Very awkward … if only we had liners. Therefore one of our first purchases before we hit the road is a set of pannier liners. There are a number of options for the ST and in the end we went with the Bestem pannier liners. After getting them out they fit perfectly, really well made. high quality, all for less then $130 delivered.
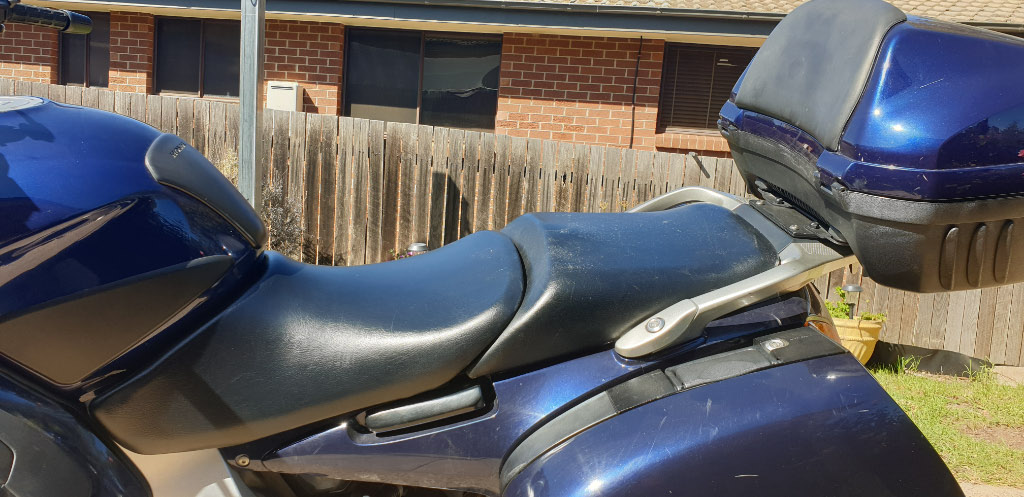
I also made a modification to the position of the top box by moving it back by 30mm to give us a bit more room. To do this I made an adapter plate. While 30mm doesn’t sound like much it does make a big difference.

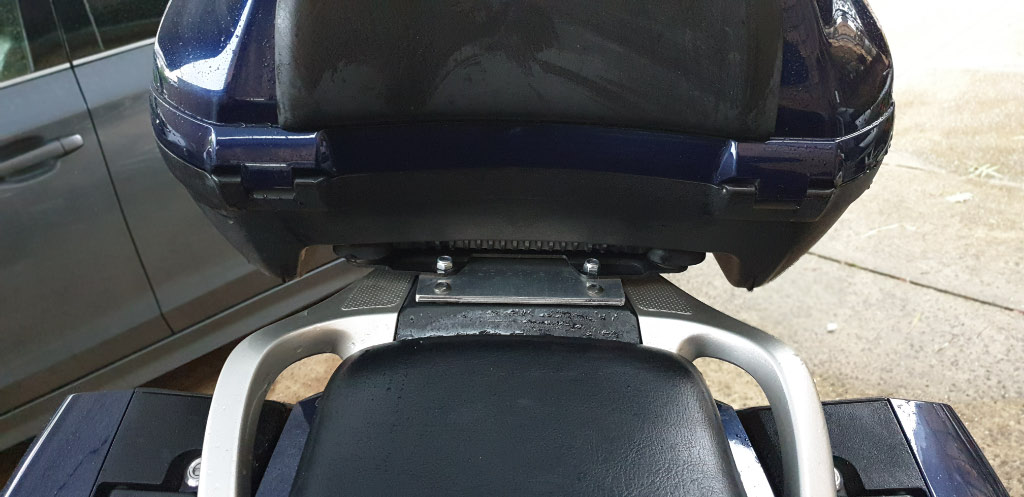


After a two hour ride this has done the job, and a coat of paint and it now looks like part of the bike.
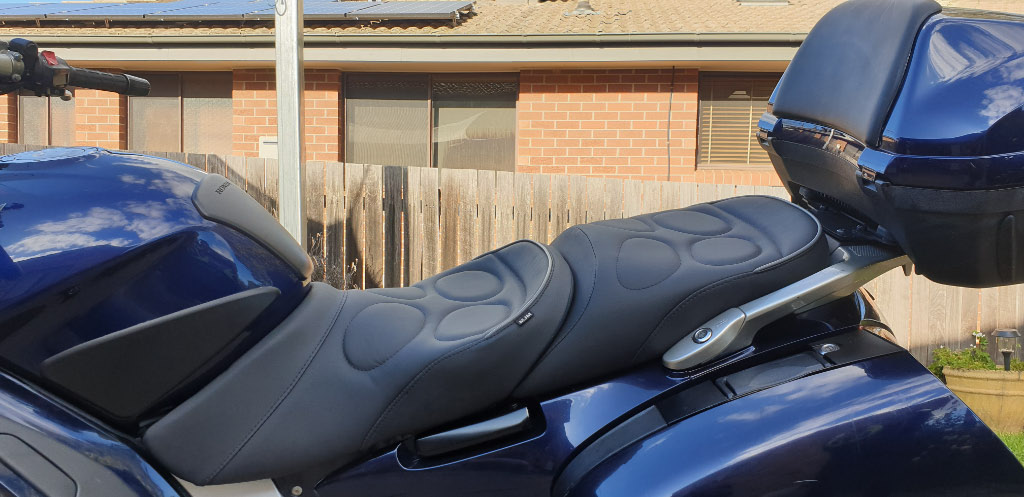
Seat
The ST has a nice big plush rider and pillion seat that is nice and comfy. Well it is for about 50km and then it gets really uncomfortable! A touring bike designed to do big miles with an uncomfortable seat just won’t do.!
In the past I used to put up with the standard seat as I didn’t know any better. However on my 2008 ZX14 I sent my seat to John Moorehouse of Ergo Motorcycle Seats in Brisbane to get remade. That seat is now on my ZX14R and has done over 300,000km and I still love. It probably could do with a recovering soon as it is starting to wear but it feels like a pair of comfortable old pair of shoes.
There really is no need to put up with an uncomfortable seat. We recently took the ST up to MJM Custom Motorbike Seats in Goulburn to get the OEM seat remade it and set up for us. Mike does a one day deal – drop the bike off in the morning, wander around Goulburn for the day, and pick the bike up in the afternoon.

For our seat Mick re-foamed the seat using a number of different foam densities in the various areas of the seat, and completely re-shaped both seats to fit us. Mick also increased the height of the pillion seat to give Deb a bit better vision rather than just looking at the back of my helmet. The other advantage of raising Deb’s seat is that also effectively lowered her pegs, also adding to the overall comfort while on the bike.
Standard seat at its three height settings
Low 
Medium 
High
Our custom made seat at its three height settings
Low 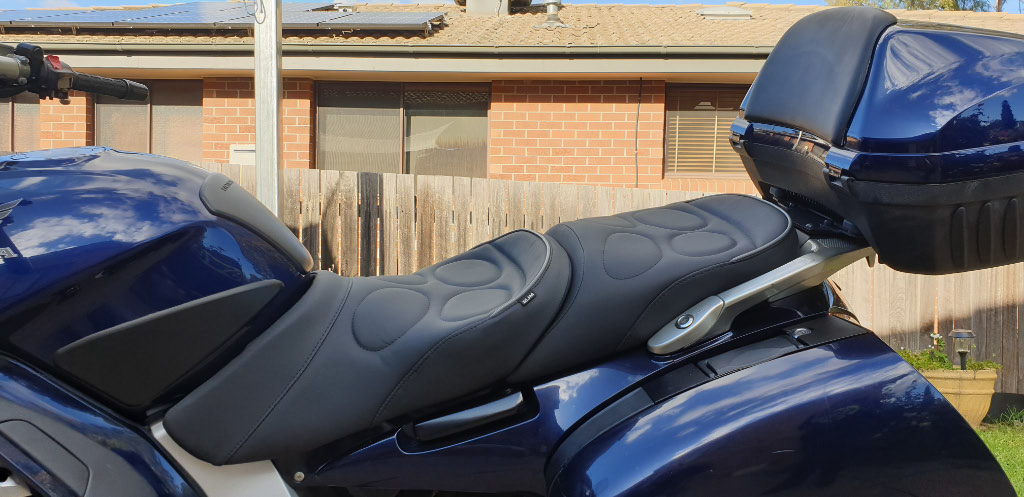
Medium 
High
Now we just need some seat time to break-in the new seat as they often take some time to settle in.
Screen
I’ve had a bit of experience now with getting the right screen for a sports bike, however these big screens are all new to me. When I first rode the ST I expected to sit in a bubble of quiet still air, where we could talk comfortably over the intercom. But that was not what I experienced. What I did experience was noise and turbulence. Where I was semi-comfortable Deb wasn’t, and where Deb was … I wasn’t.
Looking around there I have narrowed it down to three main choices, the Bike-Quip screen, the California Scientific screen, and the National Cycle – VStream screen. Reading the forums, these seem to be the main contenders and everyone has a view of why their’s is best…
If only you could test each of them back-to-back…
And then there are the guys at Madstad who while not doing something specifically for the ST do work on screen mounting systems on a wide range of bikes to improve the airflow under the screen to smooth the air over the screen. A lot of their bracketry focuses on moving the screen away from the bike to improve the airflow behind the screen. It sounds counterintuitive, but improving the air behind the screen is meant to smooth the air coming over the top of screen instead of the being dumped over the top into a low-pressure area behind the screen creating turbulance.
It seemed like a cheap experiment, $5 in parts and a bit of my time to space the screen out 25mm to allow more air under the screen.

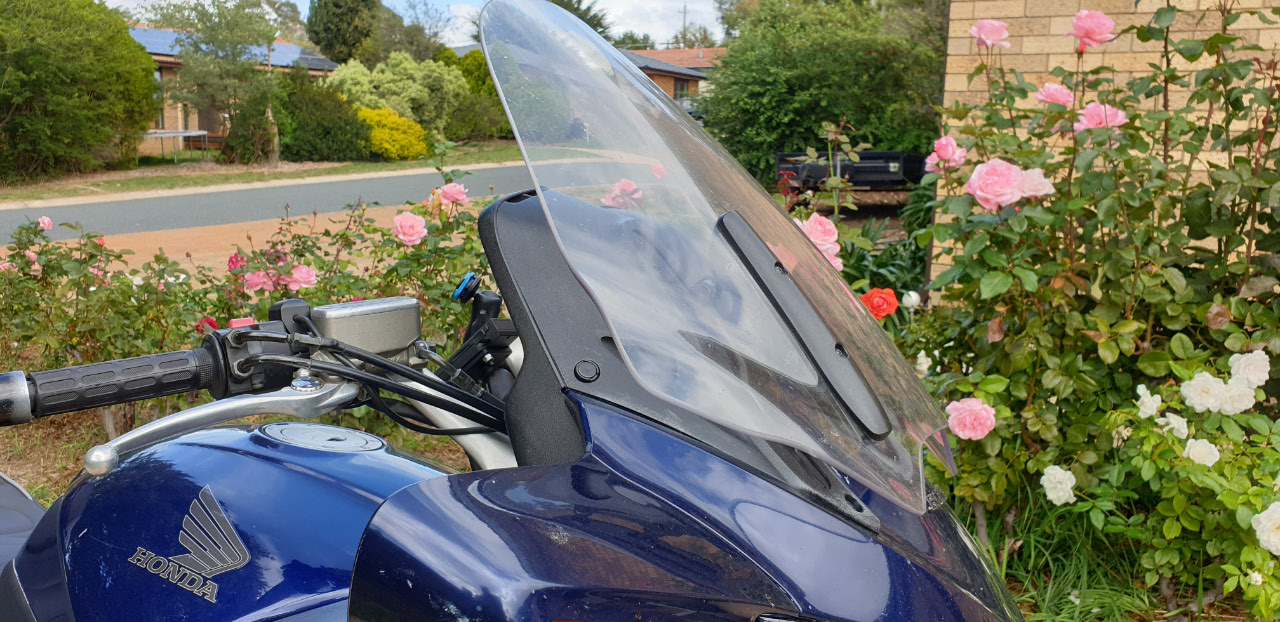
Conclusion – it certainly improved the turbulence and the noise. making the bike much more comfortable for longer distances. However I still think I will end up replacing the screen at some stage in the future.
The other complaint is that the screen needs to be just a bit wider to push the wind and rain out and around my shoulders. Deb also finds that the current screen causes her jacket to flap a lot worse than on the 14 where we are more exposed. Therefore a wider screen should help.
However I’ll probably wait until a ST meet-up where I can look at a few of the options. So the screen can wait for now.
So now all we need is a destination. However, given COVID19 now is the time to lay low so any bike trip is going to have to wait until we are clear to travel again.
Stay safe everyone.


Great Post on setting up the bike
LikeLike
Looks fantastic!
LikeLike
I love your article .I have owned my Pan1300 since 2002 .It had 800 miles when I bought it and now it has 69000 wonderful miles .This includes Europe Scotland and a large portion of the UK. I have a sculptured seat and raised screen .I would fully reccomend one of those .I use a fully fitted Autocom wired intercom which is great .For me the suspension is fine and has been faultless with all manner of different weight scenario ‘s
After reading your blog I am going to fit some daytime riding lights which fortunately I have just been given .They are the type with magnified lenses .
I am a retired UK police motorcylist and for me the Pan 1300 is the ultimate tourer .Thankyou for sharing your blog .
LikeLike
thanks Denis. Yes they are a very capable tourer.
LikeLike
Have over 116000 miles on my 2005 ST1300. Still running strong. All of this on a 90% stock bike. The Wife doesn’t much care for the ride. Said she gets pushed around a lot from wind coming around the windshield, up is better with a Clearview wider windshield but still an issue.
LikeLike
I was always reluctant to buy one as they seemed boring. But they are a very capable tourer.
The Puig touring screen is certainly better than the standard screen and also works best for the pillion at below eye level
LikeLike
Pingback: Honda ST1300 LED Lighting Upgrade | Zed14